TUTORIAL: HOST YOUR OWN WEBSITE ON NETLIFY

Hosting your own website might sound like a difficult task, yet if you follow the steps mentioned in this article — I am sure you’ll be able to host your own website in no time.
First, let’s address -
What Is Netlify?
Netlify is a cloud computing company that offers hosting and serverless backend services for web applications and static websites.
Why You Should Use Netlify?
- Free hosting
- Easy Integration
- No expiry
- Superfast due to global distribution and automated pre-rendering.
Prerequisite
You do need to have a GitHub account and a repository (which you want to host). This article is not code-intensive, just follow the steps patiently.
LET’S GET STARTED!
Head over to Netlify and log in using your GitHub account.

After the login is complete, go to the Sites section and click on New Site From Git. Doing so will direct you to a new page called Create New Site.

Creating a new site majorly consists of 3 tasks:-
Task 1: Connect to Git provider

⨀ Be sure to push your repository to GitHub, so that all you’ll need to do is link Netlify to GitHub. Click the GitHub button as illustrated.

⨀ To allow Netlify access to your GitHub account, you will have to Authorize Netlify. Netlify doesn’t store your GitHub access token on their server. If you’d like to know more about the permissions, requests, and why we need them, you can visit our documentation on Git provider permissions.
🔹This will direct you back to the Create a new site page.

For Newbies — If you are authorizing your Netlify account with GitHub for the first time you will have to select Configure Netlify on Github (one-time step).
How To Configure Netlify on GitHub?
⨀ Choose your profile.

Moving forward…
Task 2: Pick Your Repository

⨀ You will be directed to an Install Netlify page where all your repositories will be selected by default. This selection refers to the repositories you want to host.
⨀ You can change your selection by choosing the Only select repositories option. This will lead to a drop-down including a list of all your GitHub repositories. Please pick the one you wish to host, you can see I have chosen DonationPaymentGateway below
⨀ Click on Install and Reconfirm your password as the final step of task 2.

You will see that the repository of your choice can be seen now. Click on your chosen repository and get ready for the last task.
Task 3: Site settings and deploys

After choosing your repository, you will reach Configure Your Settings Page — Make sure to recheck the owner and branch. ⨀ Fill in the basic build settings section.
- The base directory is an optional command, you can leave it.
- In the Build command write — npm run build
- In the Publish directory write -dist
You can read about these commands in detail here.
⨀ Click the Deploy site button to continue with the deployment process.

This might take a minute…

WUHU, WE ARE DONEEE✨✨

⨀ To double-check that your site has finally been published, scroll down to the production deploys section and click on it.
⨀ Here you can see the procedure Netlify followed to make your site live.
There’s a preview button on the right top — You can select it to see how your live website looks.
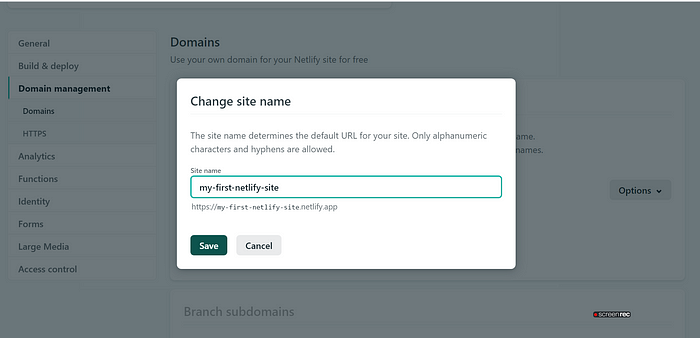
Change Your Site Name
Netlify automatically generates a name for your site.
Let’s update that by visiting the ‘Site Settings’ tab and selecting
Domain Management -> Options(present on the right) -> Edit Site Name
Congratulations! You Did It — I am proud of you! 🎉
Wasn’t that easy? To take it a step further, set up your custom domain.
Netlify is everything you need to build fast, modern websites: continuous deployment, serverless functions, and so much more.
If you have any queries or want to share your hosting experience, please feel free to reach out to me on LinkedIn.